
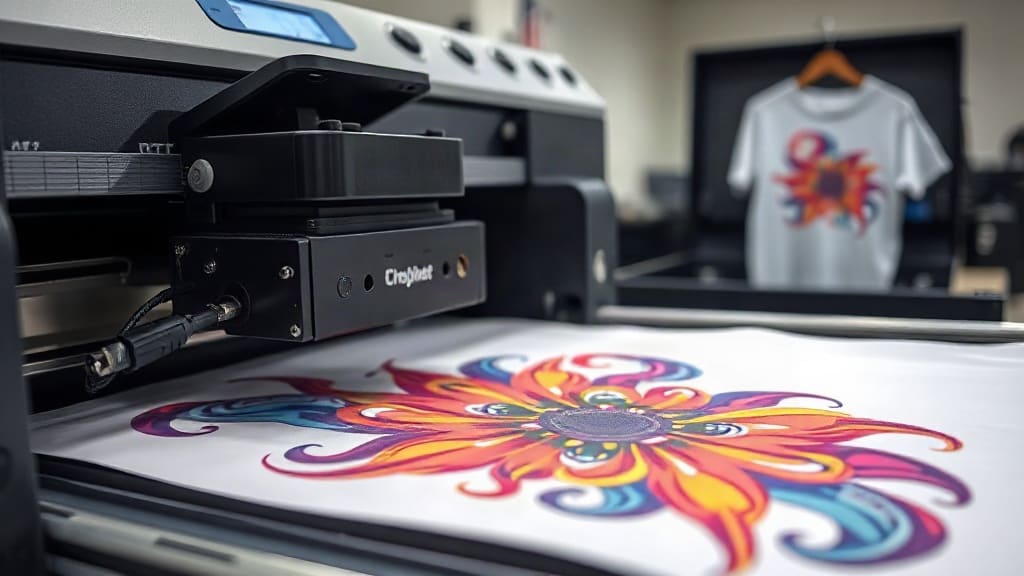
DTF printing, or Direct to Film printing, has taken the custom apparel industry by storm. If you are new to this technology, you might be wondering what it is, how it works, and whether it is the right choice for your business or hobby. In this complete guide, I will walk you through everything you need to know about DTF printing, based on my own experience testing different printers and materials. By the end, you will have a clear understanding of the process, the equipment, and the potential pitfalls, so you can make an informed decision.
What Is DTF Printing?
DTF stands for Direct to Film. Unlike direct to garment (DTG) printing, which prints directly onto the shirt, DTF printing involves printing a design onto a special PET film first. Then, an adhesive powder is applied to the wet ink, and the film is cured. Finally, the film is transferred onto the fabric using a heat press. This method works on a wide variety of fabrics, including cotton, polyester, blends, and even nylon, with proper preparation.
How Does DTF Printing Work?
To help you visualize the process, let me break it down step by step. I remember the first time I tried DTF printing at home; I was surprised by how straightforward it was once I had the right setup.
- Design and print: You create or upload a design on your computer and print it onto a special DTF film using a printer equipped with CMYK and white ink. The white ink acts as a base layer to make colors pop on dark garments.
- Apply adhesive powder: While the ink is still wet, you shake a hot-melt adhesive powder over the film. This powder sticks only to the inked areas because the white ink is slightly tacky.
- Cure the powder: You then cure the film in an oven or with a heat press (using a low temperature and a Teflon sheet) to melt the powder and bond it to the ink. This step is crucial; if undercured, the adhesive won't stick properly.
- Heat transfer: Place the film on your garment with the printed side down. Press it with a heat press at around 160°C (320°F) for 15 to 20 seconds with moderate pressure.
- Peel: After pressing, you peel the film off either hot or cold, depending on the film type. You now have a vibrant, durable print.
This process may sound simple, but each step has nuances that affect the final quality. For instance, humidity can affect the adhesive powder, so you need to store your materials properly.
Equipment and Materials Needed for DTF Printing
Before you start, you will need to invest in some essential equipment. I recommend starting with a dedicated DTF printer rather than converting an existing one, because the ink system is different. Here is a list of what you need:
- DTF printer: A printer that can handle white ink circulation to prevent clogging. Options like the Epson L805 or L1800 are popular among small businesses.
- DTF inks: Specifically formulated for DTF, these include CMYK plus white. High-quality inks prevent color shifting and ensure adhesion.
- PET films: These are the transfer films. You can choose between A4 or roll sizes, and some have a coating that enhances ink adhesion.
- Adhesive powder: Hot-melt powder that comes in different particle sizes. Finer powders work well for detailed designs, while coarser ones are better for heavy ink coverage.
- Heat press: A clamshell or swing-away press with accurate temperature control. You will also need a way to cure the powder, which can be done with a separate low-temperature press or a curing oven.
- Shaker and drying station: A powder shaker that vibrates to coat the film evenly, and a drying rack or conveyor dryer to cure the powder.
If you are just starting out, you might be tempted to buy a complete kit that includes everything. That is a viable option, but ensure the components are compatible and of good quality. I have seen many beginners struggle because they bought cheap films that peeled off after a few washes.
DTF vs. Other Printing Methods
To understand where DTF fits in, let me compare it with DTG and screen printing. DTG prints directly onto the shirt and is great for detailed, full-color designs, but it requires a pretreated cotton garment and can be slow for bulk orders. Screen printing is excellent for large quantities of simple designs, but the setup cost is high and not practical for one-off items.
DTF combines the ease of digital printing with the versatility of heat transfers. You can print designs on demand, and the transfers can be stored for later use. This makes it ideal for small batches, personalized items, and even printing on tricky surfaces like hats or bags.
Pros and Cons of DTF Printing
Every technology has its trade-offs. Here is my honest assessment based on my experiences:
Pros
- Works on many fabrics, including cotton, polyester, and blends, without pretreatment.
- Excellent color vibrancy, especially on dark fabrics, because of the white underbase.
- Soft hand feel compared to traditional transfers, though not as soft as DTG.
- High durability; prints can withstand many washes if cured properly.
- Cost-effective for low to medium runs, and you can print as many transfers as you want in advance.
Cons
- Initial investment can be high if you buy a dedicated printer and accessories.
- White ink can clog if the printer is not used regularly, so you need to maintain a cleaning schedule.
- The process has several steps, which can lead to errors if you are not careful.
- You need to manage the powder carefully to avoid it sticking to the film background, which would cause adhesive residue on the garment.
Tips for Getting the Best Results
After countless trial and error, I have compiled a list of tips that will save you time and frustration:
- Calibrate your colors: Use a color profile for your DTF printer to ensure the printed colors match your screen. I use a calibration tool every week.
- Shake the powder well: Before applying, mix the powder to break up lumps. Uneven powder leads to weak adhesion.
- Don't over-cure the powder: Overheating can cause the powder to yellow or become brittle. Follow the film manufacturer's recommendations.
- Test on a sample: Always do a test press on a scrap fabric to check the temperature and pressure before pressing your final garment.
- Store films properly: Keep your films and powders in a dry, cool place. Humidity is the enemy of DTF printing.
- Choose the right film for your fabric: Some films are designed for stretchy fabrics, while others are for rigid surfaces. Using the wrong one can cause cracking.
Common DTF Printing Mistakes to Avoid
I have made many mistakes so you don't have to. Here are the most common ones I see in forums and from my own early days:
- Using regular ink: DTF requires specific inks with the right viscosity and compatibility with the adhesive powder. Regular ink will not work.
- Skipping the cure: Some people try to press the film without curing the powder, resulting in poor adhesion and washout.
- Incorrect peeling: Some films need hot peel, others cold. Check the instructions; otherwise, you might pull the ink off.
- Not cleaning the printer: White ink is prone to settling. Run a cleaning cycle daily or at least every 48 hours to prevent clogs.
- Ignoring pre-press: Pre-pressing your garment for a few seconds removes moisture and wrinkles, which helps the transfer stick better.
Is DTF Printing Right for You?
So, should you invest in DTF printing? If you are a small business owner looking to expand your product range without a huge investment in screen printing equipment, DTF is a fantastic option. It also suits hobbyists who want to create custom shirts for friends and family. However, if you plan to print thousands of shirts a day, you might eventually need to combine DTF with other methods to maximize efficiency.
Consider your budget, space, and production volume. I started with a basic setup in my garage, and it paid for itself within a few months. The flexibility to print on demand and create samples quickly is a huge advantage.
Frequently Asked Questions
What is the difference between DTF and DTG printing?
DTF prints onto a film and transfers to the fabric, while DTG prints directly onto the garment. DTF works on more fabric types and doesn't require pretreatment, but DTG offers a softer hand feel. For small orders, DTF is often more cost-effective.
Can I use a regular printer for DTF printing?
No, you cannot use a standard inkjet printer because DTF requires white ink, which is thicker and needs a circulation system to prevent clogging. You need a printer that supports white ink or one that has been converted specifically for DTF.
How long do DTF transfers last?
If you store your DTF transfers in a cool, dry place away from direct sunlight, they can last for months, even up to a year. The adhesive powder should remain effective as long as it stays dry.
What fabrics are not suitable for DTF printing?
While DTF is versatile, it struggles with very stretchy fabrics like spandex or athletic wear with high elasticity. The print may crack when stretched. For such fabrics, you need a special stretchable film, but results may still vary. Also, waterproof or coated fabrics may not allow proper adhesion.
Do I need a heat press for DTF printing?
Yes, a heat press is essential for both curing the adhesive powder and transferring the design. You cannot use a household iron because it doesn't provide even pressure and temperature control, which are critical for a durable print.
Final Thoughts
DTF printing is a game-changer for the custom apparel industry, offering a low-cost entry point and incredible versatility. While there is a learning curve, the rewards are worth it. I encourage you to start small, practice on sample materials, and gradually refine your process. With the right equipment and a bit of patience, you can produce professional-quality prints that will impress your customers. I hope this guide has given you the confidence to dive into the world of DTF printing. If you have any questions, feel free to reach out in the comments below.