
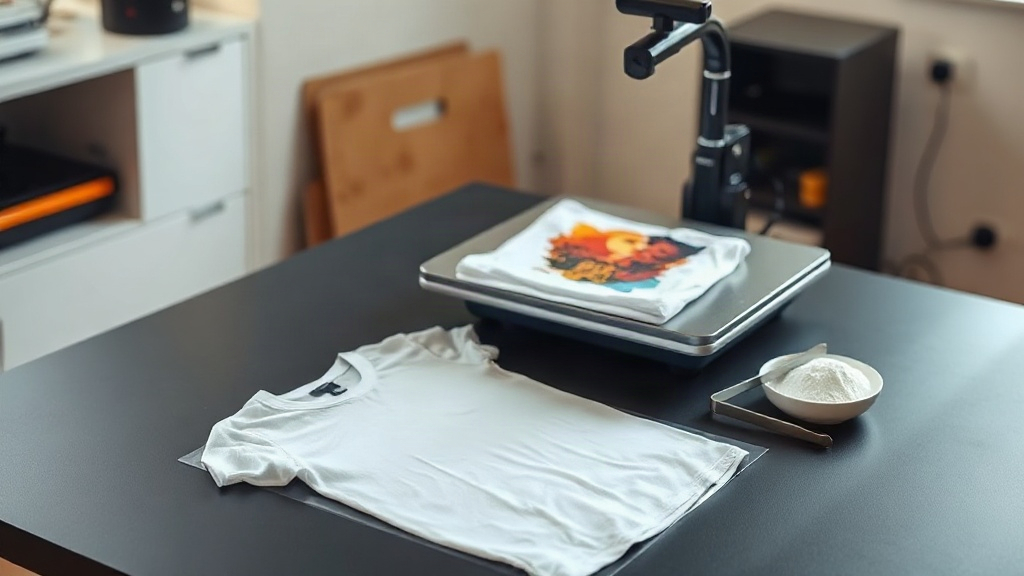
Most people who try DTF printing for the first time ruin their initial transfers for reasons that have nothing to do with talent. They peel too early, powder too little, cure unevenly, or press a shirt that still has fabric softener in it. I know this because I made every one of those mistakes on my own first run of shirts, and I ended up with cracked, faded, half-transferred designs that looked like they had been through a decade of washing before lunch. The good news is that DTF is one of the most forgiving print methods once you understand what each step is actually doing.
This guide is the version of that lesson I wish someone had handed me. No vague encouragement, no "just experiment until it works." We will go through the materials, the workflow, the press settings, and the specific failure points that trip up beginners, in plain language you can act on this week.
What DTF Printing Actually Is
DTF stands for direct to film. Instead of printing straight onto a garment, you print a mirrored image onto a special PET film using a printer loaded with pigment inks, sprinkle a hot melt adhesive powder over the wet ink, cure the powder, and then heat press the film onto fabric. The adhesive melts into the ink and bonds to the textile, then you peel the film away and the design stays behind.
The reason this method has become so popular with small shops is flexibility. You are not limited to cotton like you are with DTG, and you are not paying for screens like you are with screen printing. A single sheet of film can carry a full color photo, gradients, fine lines, and dozens of colors, all with the same setup. That makes short runs and one offs genuinely practical rather than a compromise.
What surprises most beginners is that the print on the film looks dull and flat before pressing. That is normal. The color deepens and sharpens once the adhesive activates and the ink sits flat against the fabric.
The Materials You Need to Get Started
You can spend a lot of money very quickly here, so start lean. A basic setup includes:
- A dedicated DTF printer, or a converted inkjet printer with pigment inks and a film feeding path that handles the thicker media without jamming
- PET transfer film, either cold peel or hot peel depending on your preference
- Hot melt adhesive powder, usually TPU based, in fine or medium grain
- A heat press with accurate temperature and even pressure across the platen
- A curing method, which can be a dedicated powder curing oven, a heat press with a cover sheet, or a careful pass with a heat gun
- Stretchable or standard garment blanks, ideally cotton or a cotton polyester blend
Two pieces of equipment deserve extra attention. First, the press. A cheap press with uneven heat will make you think your technique is bad when the machine is the problem. Second, the curing setup. Powder that is not fully melted will feel gritty and will wash out fast, no matter how nice the press job looks.
Film Choices: Cold Peel vs Hot Peel
Hot peel film lets you pull the carrier sheet while the transfer is still warm, which speeds up production and tends to leave a slightly softer hand feel. Cold peel film requires you to wait until the transfer cools completely, which is slower but more forgiving if you are still dialing in your press settings. If you are just starting, cold peel gives you more room for error while you learn what a proper press feels like.
Powder Grain Size
Fine powder gives you smoother detail and a thinner final layer, which is great for small text and intricate artwork. Medium powder covers heavier ink deposits more reliably and is more forgiving when your print has large solid areas. Many shops keep both on hand and switch based on the job.
The Step by Step Workflow
1. Prepare and Print Your Artwork
Mirror the image before printing, because the design transfers face down. Use a resolution and color profile that matches your printer and ink set, and avoid over saturating the ink. A print that is too wet will make powder application messy and curing uneven.
2. Apply the Powder
While the ink is still wet, cover the print with adhesive powder. Then shake off the excess thoroughly. This step is where beginners either rush or panic. You want an even, thin coating that sticks only where there is ink. Tilt the film and tap the back; the loose powder should fall away cleanly. If powder clings to the clear film around your design, brush it off before curing, because it will show up as a hazy ghost outline on the garment.
3. Cure the Powder
The powder needs to melt into a clear, slightly glossy layer. Under cured powder stays white and grainy and will fail in the wash. Over cured film can warp and the ink can become brittle. Watch the surface rather than trusting a timer alone. It should go from chalky white to a wet looking, translucent sheen.
4. Press the Transfer
Pre press the garment for a few seconds to remove moisture and wrinkles. Place the transfer with the design facing the fabric, apply firm even pressure, and follow the temperature and time your film manufacturer recommends. Then peel according to your film type, hot or cold.
5. Finish and Check
Let the garment cool, then check the edges for lifting and the surface for grit. A quick stretch test, gently pulling the fabric around the design, tells you a lot about how the transfer will behave over time.
Common Mistakes and How to Fix Them
Almost every DTF problem traces back to one of a handful of causes. Here is how to diagnose them quickly.
- Cracking after washing: usually under cured powder or too little pressure. Increase cure time or pressure and test again.
- Patchy transfer with missing spots: uneven pressure, a wrinkled garment, or powder that was brushed off before it bonded. Check your platen and flatten the fabric.
- Stiff, plastic feeling print: too much ink or too much powder. Reduce ink density and shake off powder more aggressively.
- Design peeling at the edges: insufficient time under heat, or the garment had a coating or softener that blocked adhesion.
- Dull or faded colors: over curing, or pressing at a temperature that is too high for the film.
Keep a notebook. Write down temperature, time, pressure setting, film type, and powder type for every job. After ten entries you will have your own reliable recipe, and troubleshooting becomes a matter of checking your notes instead of guessing.
Fabric Types and Realistic Expectations
Cotton and cotton polyester blends are the easiest starting point. Synthetic fabrics like nylon and some performance wear need lower temperatures and can be tricky, since heat that is fine for cotton can damage the fabric itself. Stretchy garments benefit from stretchable powder and a press that lets the design move with the fabric rather than fighting it.
Wash care matters as much as the press. Turn garments inside out, use cold water, and avoid fabric softener and high heat drying. A properly made DTF transfer will hold up through many washes, but it will not survive mistreatment, and no print method will.
Frequently Asked Questions
How long should I press a DTF transfer?
It depends on your film and powder, but most manufacturers recommend roughly 10 to 20 seconds at around 300 to 320 degrees Fahrenheit with medium to firm pressure. Always start with the numbers from your supplier, then adjust slightly based on your results. If edges lift, add time. If the print looks scorched or glossy in a bad way, reduce temperature.
Can I use a regular home iron instead of a heat press?
You can, but results are inconsistent. An iron does not deliver even pressure across the whole design, so some areas will bond well and others will not. For occasional personal projects it might be acceptable. For anything you sell or want to last, a heat press is worth the investment.
Why does my DTF print feel rough after pressing?
Roughness almost always points to under cured powder or too much powder left on the film. Check that the powder melted into a clear glossy layer before pressing, and shake off excess more thoroughly. Fine grain powder also produces a noticeably smoother finish than medium grain on detailed artwork.
Do I need special ink for DTF printing?
Yes. DTF printing uses pigment inks formulated for film and adhesive bonding, not standard dye inks. Using the wrong ink will give you weak adhesion and poor wash durability, even if the print looks fine right after pressing.
How do I store unused DTF transfers?
Keep them flat, dry, and away from direct sunlight and heat. Stack them with the powder side protected so it does not rub off or pick up dust. Stored properly, they stay usable for months, which is one of the practical advantages of printing in batches ahead of time.
Start with one garment, one design, and one set of settings you can repeat. Once that single shirt comes out clean and survives a wash, you have a process. Everything after that is refinement, and refinement is a lot easier than starting from scratch.