
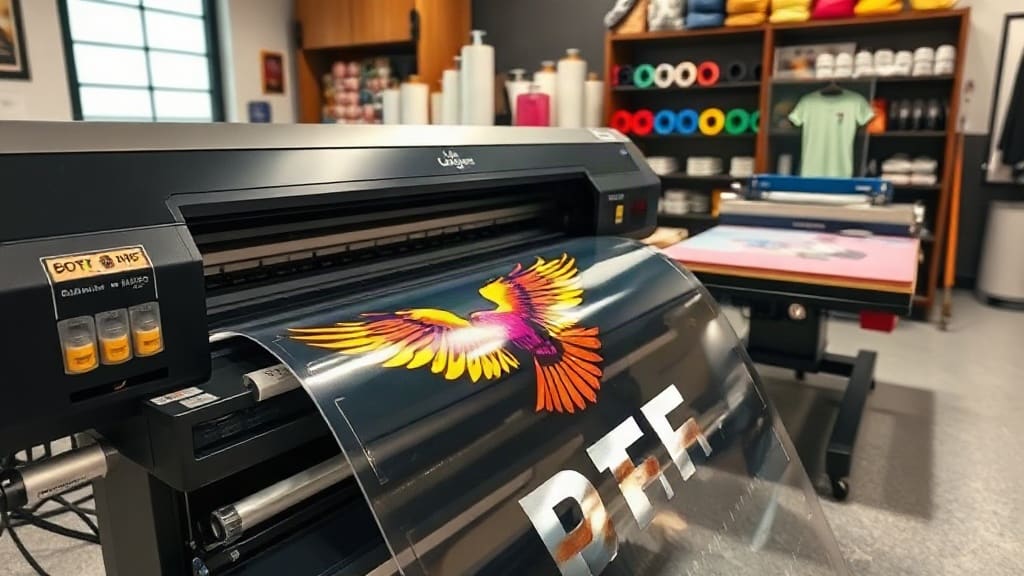
If you've been exploring custom printing options, you've likely come across the term dtf transfers. This innovative method has taken the apparel decoration world by storm, offering a versatile and cost-effective way to create stunning designs on various fabrics. Whether you're a small business owner, a hobbyist, or a seasoned printer, understanding the ins and outs of DTF transfers can elevate your product offerings and streamline your production process.
In this comprehensive guide, we'll dive deep into what DTF transfers are, how they compare to traditional methods like screen printing and sublimation, and how you can get the best results. We'll also cover essential tips for choosing the right films, inks, and powders, as well as troubleshooting common issues. By the end, you'll have a solid foundation to start using DTF transfers with confidence.
What Are DTF Transfers?
DTF stands for Direct to Film. It's a printing process where a design is printed onto a special PET film using a DTF printer and pigment-based inks. After printing, a hot-melt adhesive powder is applied to the wet ink, and the film is heated to cure the powder. This creates a transfer that can be pressed onto a garment with a heat press. The final result is a vibrant, durable design that can be applied to a wide range of fabrics, including cotton, polyester, blends, and even nylon.
The key advantage of dtf transfers is their versatility. Unlike screen printing, which requires separate screens for each color, DTF allows for full-color prints with gradients and intricate details. And unlike sublimation, which only works on polyester or light-colored garments, DTF transfers work on dark and light fabrics alike, making them a favorite among custom apparel makers.
How Does the DTF Process Work?
To fully appreciate dtf transfers, it helps to understand the step-by-step process:
- Design Creation: Use graphic software like Adobe Illustrator or Photoshop to create your artwork. Ensure the design is high resolution (at least 300 DPI) and in CMYK color mode.
- Printing: Load the PET film into your DTF printer, which is typically an Epson or similar inkjet printer converted for DTF. Print the design with white ink first (for dark garments) or only color inks (for light garments), followed by CMYK colors, and optionally a varnish layer to protect the design.
- Adhesive Powder Application: While the ink is still wet, apply a thin, even layer of hot-melt adhesive powder over the printed image. This powder is what bonds the design to the fabric.
- Drying: Shake off the excess powder and dry the film using an oven or a powder curing unit. This melts the adhesive powder, making it sticky and ready for transfer.
- Cutting: Once dried, cut out the design with scissors or a cutting machine, leaving a small border of film around the image.
- Heat Pressing: Place the film on the garment, adhesive side down, and press with a heat press at the recommended temperature and time (usually around 160-170°C for 15-20 seconds). Ensure even pressure and use a Teflon sheet to protect the film.
- Peeling: After pressing, allow the film to cool slightly before peeling it off. You can choose between hot or cold peel, depending on the film type. Most DTF films are cold peel, but always check the manufacturer's instructions.
This process may seem involved, but once you get the hang of it, it's quite straightforward. The beauty of DTF is that you can print multiple transfers in one run and store them for later use, making it ideal for on-demand fulfillment.
DTF vs. Other Printing Methods
When choosing a printing method, it's essential to weigh the pros and cons. Here's how dtf transfers stack up against other popular techniques:
DTF vs. Screen Printing
Screen printing is a classic method that's excellent for bulk orders with limited colors. It produces thick, vibrant prints that last long. However, setup costs are high, and it's not economical for small runs or designs with many colors. DTF transfers, on the other hand, have no setup costs and allow you to print multi-color designs with ease. For small to medium orders, DTF is often more cost-effective.
DTF vs. Sublimation
Sublimation works by transferring dye into polyester fibers using heat. It produces permanent, vibrant prints that don't crack or peel. But it only works on polyester or light-colored garments with a high polyester content. DTF transfers work on both cotton and polyester, and on dark fabrics, making them more versatile. If you're printing on cotton t-shirts, DTF is your go-to.
DTF vs. Heat Transfer Vinyl (HTV)
HTV is a simple method for cutting out designs from vinyl sheets and pressing them onto garments. It's great for simple, single-color designs but lacks the detail and color range of DTF. DTF transfers allow for photorealistic prints with gradients and shadows, which HTV cannot achieve.
Choosing the Right DTF Supplies
To produce high-quality dtf transfers, you need to invest in the right materials. Here's a quick rundown:
- DTF Printer: You can convert an Epson EcoTank or other inkjet printer with a DTF conversion kit, which includes a film feeder and sometimes an ink system. Alternatively, buy a dedicated DTF printer, which is more expensive but built for the job.
- DTF Inks: Use pigment-based inks specifically formulated for DTF. They come in CMYK, white, and sometimes clear or varnish. White ink is crucial for printing on dark garments.
- PET Film: This is the base for your transfers. Choose a high-quality film with a good grip to prevent slipping during printing. Some films are designed for cold peel, others for hot peel.
- Adhesive Powder: The powder's particle size matters. A fine powder works for detailed designs, while a coarser one is better for solid prints. Always use a powder that matches your film's peel type.
- Heat Press: You'll need a heat press that can reach at least 160°C and provide even pressure. A clamshell press or a swing-away press both work, but ensure the platen is large enough for your transfers.
- Protective Film (Optional): Some printers use a clear lacquer or varnish to protect the ink from scratching. This is not mandatory but can enhance durability.
When starting out, you might consider buying a DTF starter kit that includes everything you need. This can be a cost-effective way to test the waters without investing in each component separately.
Tips for Achieving Perfect DTF Transfers
Getting consistent, high-quality results requires attention to detail. Here are some expert tips:
- Calibrate your printer: Run nozzle checks frequently and clean the printhead if needed. Clogged nozzles can cause missing lines or faded prints.
- Use a RIP software: A RIP (Raster Image Processor) can help manage color profiles and improve print quality. Many DTF users rely on software like AcroRIP or ErgaSoft.
- Control the powder application: Too much powder can cause the design to crack or have a raised texture. Too little can result in poor adhesion. Aim for an even, thin layer that covers the entire printed area.
- Dry the film properly: If the film isn't fully dry before pressing, the adhesive may not activate properly. Use a dedicated dryer or oven at the recommended temperature and time.
- Test on scrap fabric: Always test your settings on a piece of fabric similar to your final garment. This helps you adjust temperature, time, and pressure without wasting materials.
- Pre-press the garment: Removing moisture and wrinkles from the garment before pressing can improve adhesion. A quick pre-press for 2-3 seconds is usually enough.
Common Problems and How to Solve Them
Even experienced printers encounter issues occasionally. Here are some common problems with dtf transfers and their solutions:
- Washing out or cracking: This often results from under-curing or insufficient powder. Ensure you're using the correct powder-to-ink ratio and that the film is dried at the right temperature. Also, press with enough pressure and time.
- Peeling off easily: The adhesive might not be activated fully. Double-check your drying and pressing temperatures, and consider increasing the pressure slightly.
- Colors not vibrant: This could be due to low ink saturation. Increase the number of print passes in your RIP settings or adjust the color profile. Also, ensure you're using quality inks.
- White ink issues: White ink pigment settles quickly, so keep it agitated in the printer. If you notice a grainy texture, you might need to use a finer powder or adjust the print head distance.
- Ghosting or smudging: This occurs if the film shifts during pressing. Use heat-resistant tape to secure the film to the garment, and avoid moving the heat press.
Applications and Business Opportunities
DTF transfers open up numerous possibilities. They are perfect for custom t-shirts, hoodies, tote bags, and even socks. Because they work on various materials, you can expand your product line without investing in multiple printing technologies. For entrepreneurs, starting a DTF transfer business is relatively low-cost compared to other methods. You can offer print-on-demand services, sell pre-made transfers online, or even print transfers wholesale for other businesses.
One of the significant advantages is that DTF transfers can be produced in advance and stored. This means you can print a batch of designs and press them as orders come in, reducing turnaround times. Moreover, DTF transfers have a soft hand feel, which customers appreciate, and they can withstand multiple washes if applied correctly.
Frequently Asked Questions
Can DTF transfers be used on any fabric?
Yes, dtf transfers are compatible with a wide range of fabrics, including cotton, polyester, blends, and even leather and nylon. However, the best results are typically achieved on natural fibers like cotton, as synthetic fabrics might require lower temperatures to avoid melting.
How long do DTF transfers last?
With proper application and care, DTF transfers can last for many washes. They are durable and flexible, but the lifespan depends on factors like fabric type, washing conditions, and the quality of the materials used. Using a mild detergent and washing inside out can extend the life of the print.
What is the best temperature and time for pressing DTF transfers?
Generally, a temperature of 160-170°C (320-340°F) for 15-20 seconds with medium to firm pressure works well. However, you should always refer to the specific film and powder manufacturer's instructions, as different products may require slight adjustments.
Can I use a regular inkjet printer for DTF?
No, you need a printer that can handle pigment inks and has a good track record for DTF conversion. Most DTF users start with an Epson EcoTank printer that has been converted using a DTF kit. The conversion involves replacing the ink system with DTF-specific inks and adding a film feeder. It's not recommended to use a standard printer without conversion, as the inks and film could cause damage.
How do I store unused DTF transfers?
Once your transfers are printed and dried, you can store them in a cool, dry place away from direct sunlight. Keep them flat or in a roll to prevent creasing. As long as they are not exposed to moisture or extreme heat, they can be stored for months before use.
Final Thoughts
DTF transfers have revolutionized the custom apparel industry by combining the flexibility of digital printing with the durability of screen printing. Whether you're just starting or looking to expand your services, mastering DTF can open up a world of creative and business opportunities. With the right equipment, materials, and a bit of practice, you'll be producing professional-quality prints that satisfy your customers and keep them coming back.
Remember to always test your processes and stay updated with the latest tips and innovations in DTF technology. The more you experiment, the better you'll understand how to optimize your settings for different fabrics and designs. So, roll up your sleeves, get your heat press ready, and start creating amazing custom apparel with DTF transfers today!